Each photograph is offered at a 300dpi res/13x8cm size making them available for a very good quality digital print, but also for Iphone/IPad, smartphone or computer screen (but should convert the image into a jpeg format for doing so)
Part 1 is presenting aircraft from batch WT and the prototype.
Most of those images can be found in the book: Allied Wings 19
pdf, Epub and Kindle versions are available in this site: 978-2918590-85-9
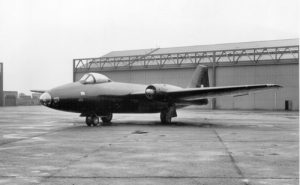
Photo Canberra B (I).8 – 01: The prototype of the B(I)8, VX185, seen on the ground showing the new nose and new shape given to the Canberra.
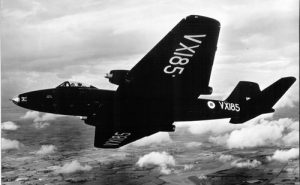
Photo Canberra B (I).8 – 02: Canberra VX185 showing off its new lines while banking to the right.
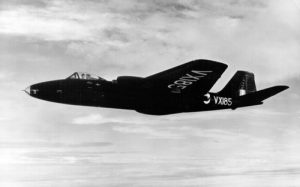
Photo Canberra B (I).8 – 03: Canberra VX185 taken during one of the test flights.
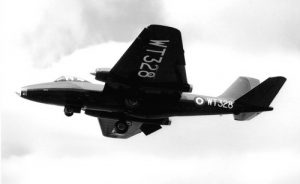
Photo Canberra B (I).8 – 04: Canberra WT328 taken while landing showing its black undersurfaces and white serials. This was the first camouflage painted on the Canberra B(I)8 when they were delivered to the RAF. WT328 was never issued to an RAF squadron.

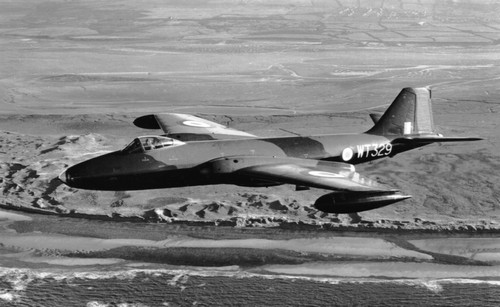
Photo Canberra B (I).8 – 05: Canberra B(I).8 WT329 was never issued to any squadron and flew various trials with the RAF before being modified as a B(I) Mk.12 for the RNZAF.
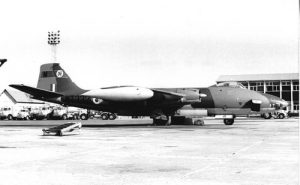
Photo Canberra B (I).8 – 06: Canberra B(I).8 WT332 of No. 3 Sqn with the letter M painted on the tail in 1971.
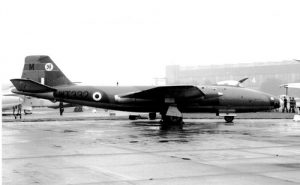
Photo Canberra B (I).8 – 07: Another view of WT332.
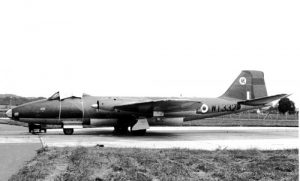
Photo Canberra B (I).8 – 08: Canberra B(I).8 WT332 seen while serving with 3 Sqn (easily identifiable by the green band on the tail and the squadron’s emblem located forward of that). The silver undersides were introduced during the mid-sixties and the serials painted in black.
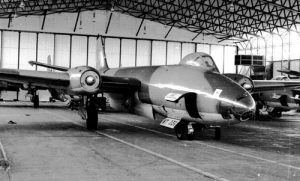
Photo Canberra B (I).8 – 09: Canberra B(I).8 WT336 seen in a hangar.
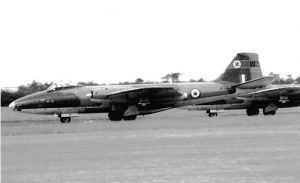
Photo Canberra B (I).8 – 10: Canberra B(I).8 WT336 served in the early 1970s with 3 Sqn and received the full squadron markings. Note the individual letter painted on the nose wheel door and that the serial is now painted in small letters on the fuselage. (see also photo 11 below)
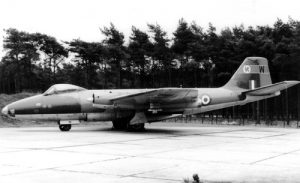
Photo Canberra B (I).8 – 11: see above.
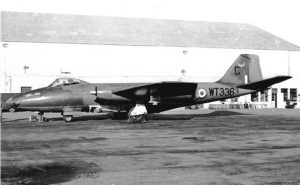
Photo Canberra B (I).8 – 12: Canberra B(I).8 WT336 of 14 Sqn in 1969-70. Note the squadron’s emblems on the tail and nose.
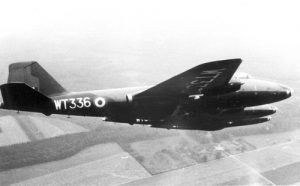
Photo Canberra B (I).8 – 13: Canberra B(I).8 WT336 een in flight early in its career with the black undersurfaces.

Photo Canberra B (I).8 – 14: Two Canberra B(I)8s of 14 Sqn flying low during the early stages of their career as shown the black undersides. They are WT336 and WT345.
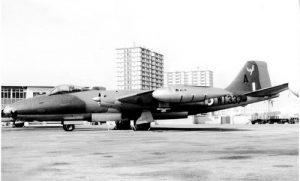
Photo Canberra B (I).8 – 15: Two side views of Canberra B(I). 8 WT337 (see below photo 16) while in service with 14 Sqn. Note that the photographs seem to be similar but note that the squadron’s emblems are not painted on the nose in the upper photograph, which was taken in 1968, while the one below was taken in 1970.
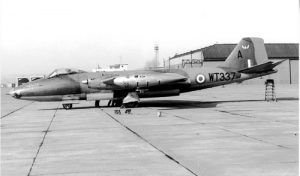
Photo Canberra B (I).8 – 16: see above.
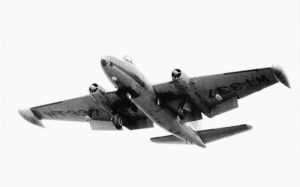
Photo Canberra B (I).8 – 17: Canberra B(I).8 WT337 is seen landing and showing its silver undersides and serials.
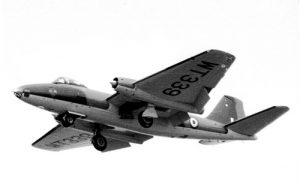
Photo Canberra B (I).8 – 18: Canberra B(I).8 WT339, taken before being passed to 3 Sqn, with no markings visible but with the serial painted in small letters on the fuselage
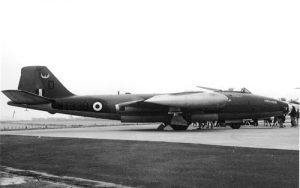
Photo Canberra B (I).8 – 19: Canberra B(I).8 WT339 seen in full 14 Sqn markings in 1969 and the individual letter ‘D’

Photo Canberra B (I).8 – 20: Another side view of WT339/D of No. 14 Sqn.
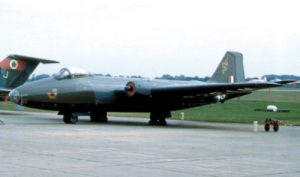
Photo Canberra B (I).8 – 21: With the snake on the fin, this Canberra B(I).8, WT339, belongs to 88 Sqn.
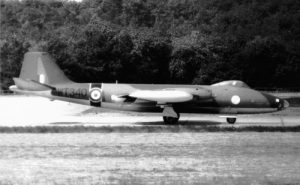
Photo Canberra B (I).8 – 22: two photos (with photo 23) of WT340 while in service with 16 Sqn. Above, wearing the markings in force in the mid-sixties when the undersides became silver. Note the fuselage band typical of the squadron’s Canberras with the unit’s emblem on the nose. Below, the same aircraft taken in 1970 with some changes regarding the markings. The serial is painted on the nose wheel door and the squadron crest has replaced the previous emblem.
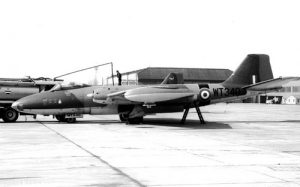
Photo Canberra B (I).8 – 23: see above
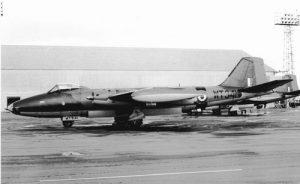
Photo Canberra B (I).8 – 24: Canberra B(I).8 WT341 seen in 1969 in 16 Sqn markings in use at that time: black outlined yellow band on the fuselage and the squadron crest under the cockpit.
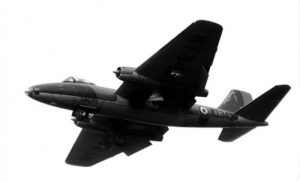
Photo Canberra B (I).8 – 25: Canberra B(I).8 WT342 taken in the final for landing.
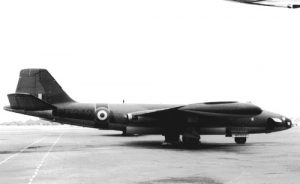
Photo Canberra B (I).8 – 26: Canberra B(I).8 WT342 of 16 Sqn in 1968. Note that the crest was present on both sides of the fuselage under the cockpit
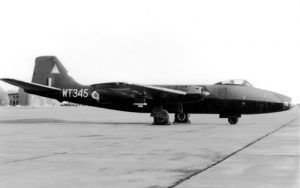
Photo Canberra B (I).8 – 27: Canberra B(I).8 WT345, in the early stages of its career, flying with 59 Sqn which was using a black exclamation mark in an red outlined white triangle (just like the road sign!).
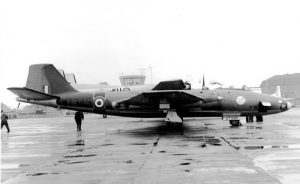
Photo Canberra B (I).8 – 28: Later on, Canberra B(I).8 WT345 served with 16 Sqn and is seen here in 1967.
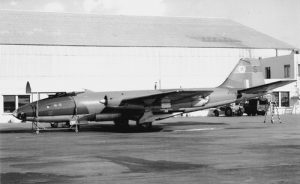
Photo Canberra B (I).8 – 29: By the end of the career of the Canberra B(I).8, the size of the serial painted on the fuselage was reduced as can be seen on WT346 of 3 Sqn in 1971.
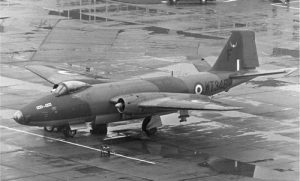
Photo Canberra B (I).8 – 30: Canberra B(I).8 WT346/F of No. 14 Sqn seen while parked.
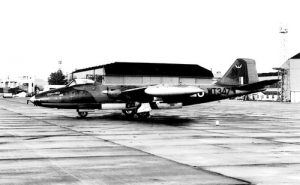
Photo Canberra B (I).8 – 31: Canberra B(I). 8 WT347 seen in 1968 with the full 14 Sqn markings. It was allocated the letter ‘N’ within the squadron.
Photo Canberra B (I).8 – 32: Canberra B(I). 8 WT347 landing with the flaps down and displaying its undersurfaces.
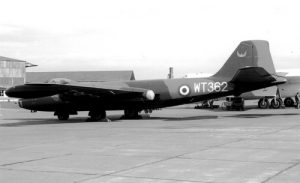
Photo Canberra B (I).8 – 33: Canberra B(I).8 WT362 spent most of its career with 14 Sqn. It is seen here in the beginning of the 1960s still with the undersides painted in semi-matt black. Note the squadron’s emblem on the fin.
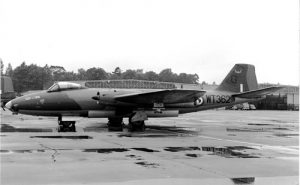
Photo Canberra B (I).8 – 34: Two photos of Canberra B(I).8 WT362 in full 14 Sqn markings at the end of the sixties. The two images are similar but note that on the upper photo, the engine intake is painted (probably in red). See also phot 35 below.
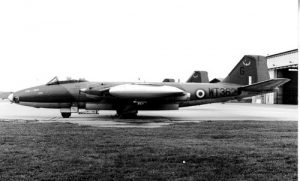
Photo Canberra B (I).8 – 35: see above.
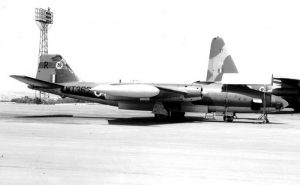
Photo Canberra B (I).8 – 36: Eventually, Canberra B(I). 8 WT362 ended its career with 3 Sqn and was coded ‘R’. This photo was taken in 1970.
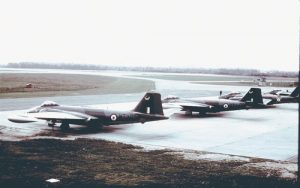
Photo Canberra B (I).8 – 37: Canberra B(I).8 WT362 of No. 14 Sqn in the forefront seen at dispersal.
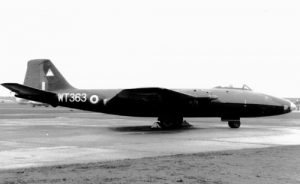
Photo Canberra B (I).8 – 38: Canberra B(I).8 WT363 was first issued to 59 Sqn and carried the ‘danger ahead’ road sign marking.
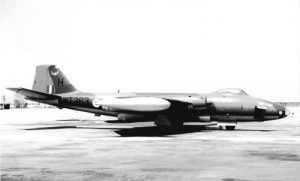
Photo Canberra B (I).8 – 39: Canberra B(I).8 WT363 while serving with 14 Sqn at the end of its career, seen here in 1968, coded ‘H’.
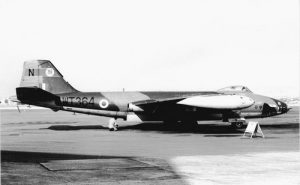
Photo Canberra B (I).8 – 40: If Canberra B(I).8 WT364 served with 3 Sqn for most of the sixties, it received the individual letter ‘N’ in the last years of the decade. This photo was taken in 1969.
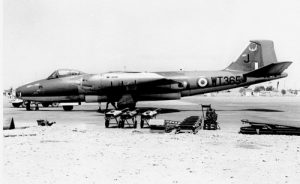
Photo Canberra B (I).8 – 41: Canberra B(I).8 WT365 spent most of its career with 14 Sqn and it is shown here in full squadron markings. By the end of its career with 14, it was allocated the
individual letter ‘J’. See also below.
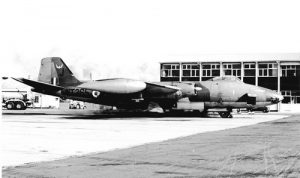
Photo Canberra B (I).8 – 42: See above.
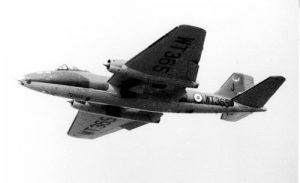
Photo Canberra B (I).8 – 43: Canberra B(I).8 WT365 seen on take off displaying its undersurfaces and serial.
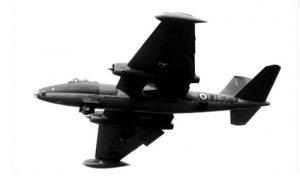
Photo Canberra B (I).8 – 44: Various views (photos 44 to 49) of Canberra (B).8 WT366 during its time service with 14 Sqn by the end of which it was coded ‘K’. It wears the full squadron markings on the tail and nose.
Photo Canberra B (I).8 – 45: See above
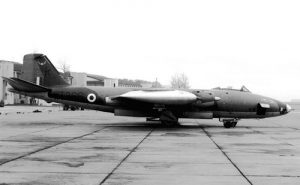
Photo Canberra B (I).8 – 46: See photo 44
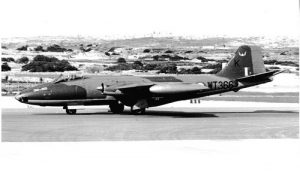
Photo Canberra B (I).8 – 47: See photo 44
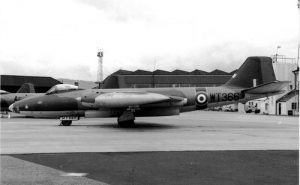
Photo Canberra B (I).8 – 48: See photo 44

Photo Canberra B (I).8 – 49: See photo 44
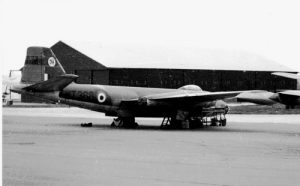
Photo Canberra B (I).8 – 50: Canberra B(I).8 WT368 served only a few weeks with 3 Sqn so it was very lucky to get a photo of it in the unit’s markings.