
Each photograph is offered at a 300dpi res/13x8cm size making them available for a very good quality digital print, but also for Iphone/IPad, smartphone or computer screen (but should convert the image into a jpeg format for doing so)
Part 2 is presenting aircraft from batch XH, XK, XM.
Most of those images can be found in the book: Allied Wings 19
pdf, Epub and Kindle versions are available in this site: 978-2918590-85-9
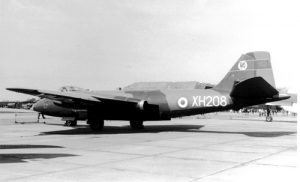
Photo Canberra B (I).8 – 101: Canberra XH208 with the early No. 3 Squadron markings with the black undersurfaces.
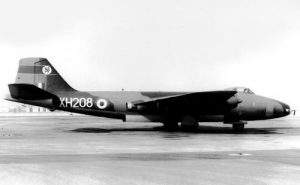
Photo Canberra B (I).8 – 102: The same Canberra, XH208, with the new undersurfaces.
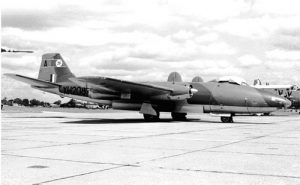
Photo Canberra B (I).8 – 103: Canberra XH208 at the end of its career with No. 3 Sqn and now coded A.

Photo Canberra B (I).8 – 104: Canberra XH209 while serving with No. 16 Sqn on its early days with the black undersurfaces.
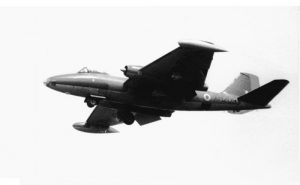
Photo Canberra B (I).8 – 105: Canberra XH209 taken on landing in the mid-1960s.
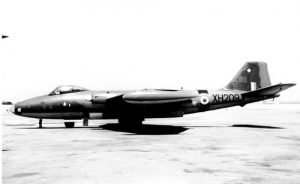
Photo Canberra B (I).8 – 106: Canberra XH209 with the camouflage and markings of the mid-1960s.
Photo Canberra B (I).8 – 107: Canberra XH209 around 1970, ‘The Saint’ from the famous TV series appeared on many aircraft along with the shark’s mouth on 16 Sqn’s Canberras.

Photo Canberra B (I).8 – 108: Canberra XH228 in early No. 3 Sqn’s markings.
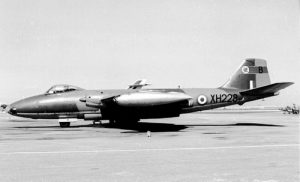
Photo Canberra B (I).8 – 109: Canberra XH228 seen later on with No. 3 Sqn’s markings of the beginning of the 1970’s, and now coded ‘B’.
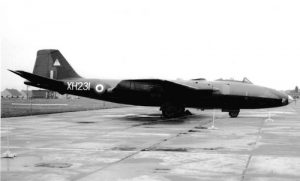
Photo Canberra B (I).8 – 110: Canberra XH231 of No. 59 Sqn…
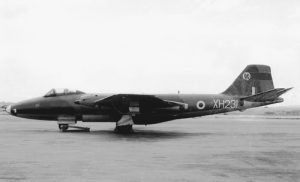
Photo Canberra B (I).8 – 111:..and the same aircraft seen in the middle of the 1960s while serving with No. 3 Sqn.

Photo Canberra B (I).8 – 112: Canberra XK951 of No. 16 Sqn with the shark’s mouth introduced at the end of sixties.
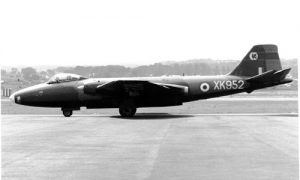
Photo Canberra B (I).8 – 113: Canberra XK952 of No. 3 Sqn.
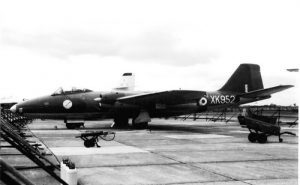
Photo Canberra B (I).8 – 114: Canberra XK952 of No. 16 Sqn.

Photo Canberra B (I).8 – 115:
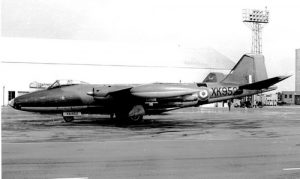
Photo Canberra B (I).8 – 116: Canberra XK952 of No. 3 Sqn at the end of the sixties.
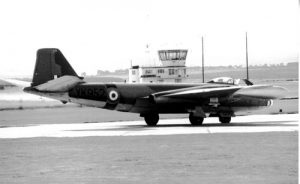
Photo Canberra B (I).8 – 117: Canberra XK952 of No. 3 Sqn at the end of the sixties.
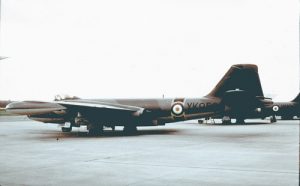
Photo Canberra B (I).8 – 118: Canberra XK952 of No. 3 Sqn at the end of the sixties.
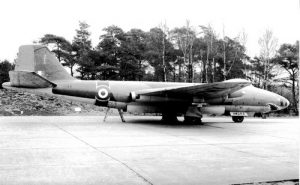
Photo Canberra B (I).8 – 119: Canberra XM244 seen at the end of its carreer, while serving with No. 16 Sqn.
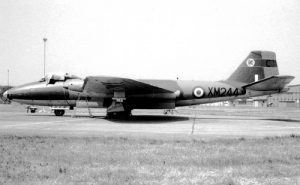
Photo Canberra B (I).8 – 120: Canberra XM244 of No. 3 Sqn and coded ‘C’.
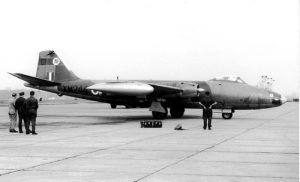
Photo Canberra B (I).8 – 121: Canberra XM244 of No. 3 Sqn and coded ‘C’.
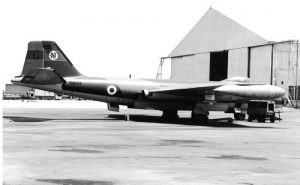
Photo Canberra B (I).8 – 122: Canberra XM244 of No. 3 Sqn and coded ‘C’ with the serial reduced in size.
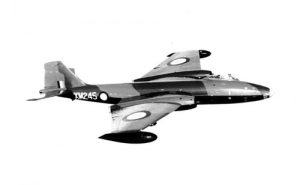
Photo Canberra B (I).8 – 123: Canberra XM245 in flight while at A&AEE at the end of the fifties.
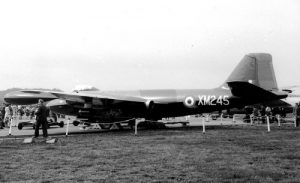
Photo Canberra B (I).8 – 124: The same Canberra XM245 taken on the ground during a display.
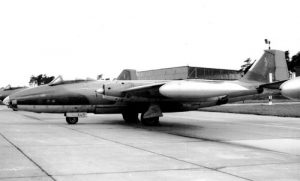
Photo Canberra B (I).8 – 125: Canberra XM245 at the end of its career with No. 16 Sqn in 1971, with ‘The Saint’ painted on the fin. Note the small serial on the fuselage and the worn paint of the serial on the wheel door
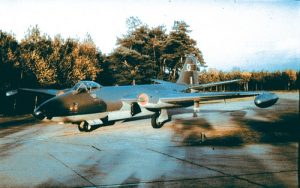
Photo Canberra B (I).8 – 126: Canberra XM245 in 3 Sqn markings and coded ‘D’ in 1970
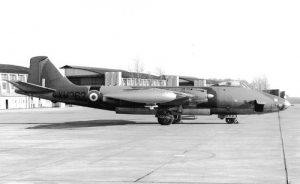
Photo Canberra B (I).8 – 127: Canberra XM262 of No. 16 Sqn with the small squadron crest painted under the nose.
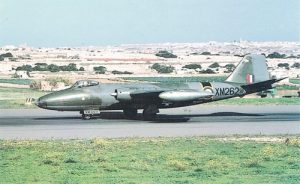
Photo Canberra B (I).8 – 128: Canberra XM262 of No. 16 Sqn.
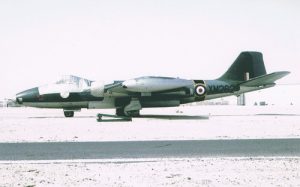
Photo Canberra B (I).8 – 129: Canberra XM262 of No. 16 Sqn.
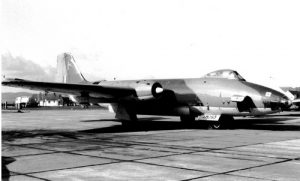
Photo Canberra B (I).8 – 130: Canberra XM263 of No. 16 sqn with ‘The Saint’ painted on the fin.
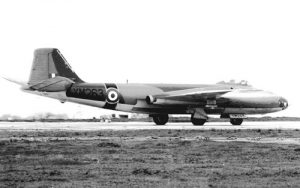
Photo Canberra B (I).8 – 131: two views (with photo 132) of Canberra XM263 in 16 Sqn markings, the unit with which XM263 spent most of its career. Above, around 1966 and, below, in 1970 with the small serial painted on the fuselage and the ‘The Saint’ insignia on the tail.
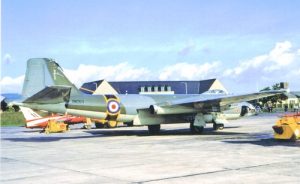
Photo Canberra B (I).8 – 132: See photo 131.
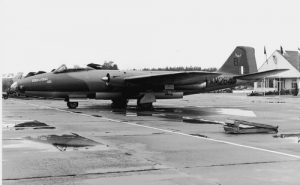
Photo Canberra B (I).8 – 133: Canberra XM264 of No. 14 Sqn, coded ‘B’ on the ground.
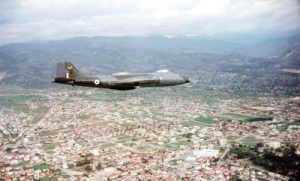
Photo Canberra B (I).8 – 134: Canberra XM264 of No. 14 Sqn, coded ‘B’ in flight.

Photo Canberra B (I).8 – 135: Canberra XM265 of 16 Sqn in the middle of the sixties
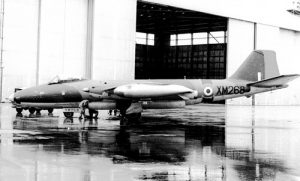
Photo Canberra B (I).8 – 136: Canberra XM268 seen while in service with 16 Sqn. Below, in the beginning of the sixties with the black undersurfaces and, above, with the markings adopted in the middle of the sixties when the silver replaced the black paint.
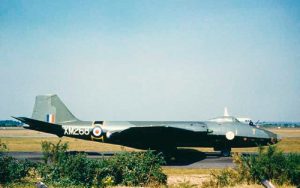
Photo Canberra B (I).8 – 137: Canberra XM268. See photo 136.
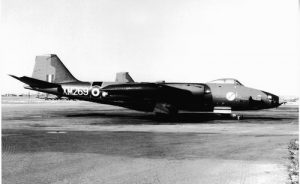
Photo Canberra B (I).8 – 138: The early days and the final days. Canberra XM269 with 16 Sqn in 1965 above and, below, in 1971 with the shark’s mouth and ‘The Saint’ insignia.
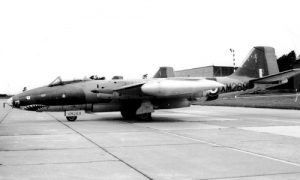
Photo Canberra B (I).8 – 139: Canberra XM269. See photo 138.
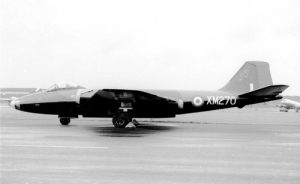
Photo Canberra B (I).8 – 140: Photos of Canberras of 88 Sqn are not that common and less so with the squadron’s snake on the fin as seen on XM270.
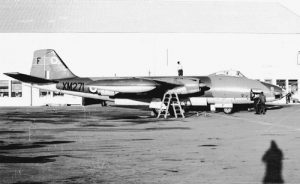
Photo Canberra B (I).8 – 141: Late markings worn by Canberra XM271 while with 3 Sqn in 1969.
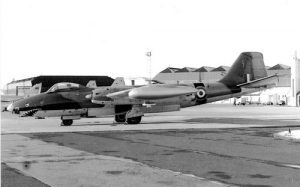
Photo Canberra B (I).8 – 142: For less than a year, between 1971 and 1972, Canberra XM271 served with 16 Sqn. At that time, the unit was easily identifiable with the shark’s mouth and ‘The Saint’ on the fin.
Photo Canberra B (I).8 – 143: Wearing 14 Sqn markings, this photo can be easily dated between December 1962 and September 1963 before Canberra XM272 was passed on to 16 Sqn.
Photo Canberra B (I).8 – 144: Canberra XM273 win 3 Sqn markings at the end of the sixties. XM273 received the individual letter ‘H’.
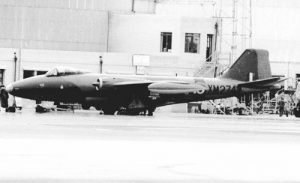
Photo Canberra B (I).8 – 145: Canberra XM274 of 16 Sqn with the standard fuselage band and the squadron crest under the cockpit.
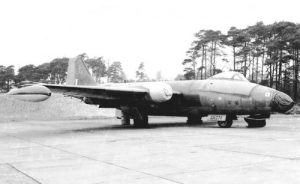
Photo Canberra B (I).8 – 146: Canberra XM274 after it had been withdrawn from use. While the insignia ‘The Saint’ is painted on the fin, the shark’s mouth is absent.
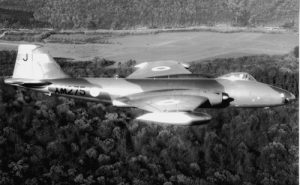
Photo Canberra B (I).8 – 147: Nice photo of Canberra XM275 in flight while serving with 3 Sqn. The serial is still black but the individual letters have made their appearance.
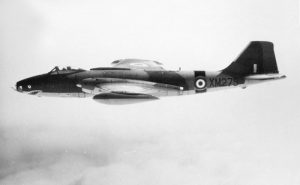
Photo Canberra B (I).8 – 148: Another view of Canberra XM275 in flight.
Photo Canberra B (I).8 – 149: Another view of Canberra XM275 banking to the left.

Photo Canberra B (I).8 – 150: Canberra XM276 of 3 Sqn with the first markings and black undersurfaces.
Photo Canberra B (I).8 – 151: Canberra XM276 still with No. 3 Sqn, but with the black undersurfaces re-painted. Note the large size white serial painted on the fuselage.
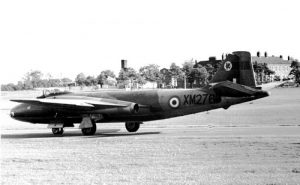
Photo Canberra B (I).8 – 152: Canberra XM276 of 3 Sqn with now the serial painted in black.
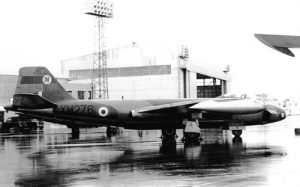
Photo Canberra B (I).8 – 153: Another view of Canberra XM276 of No. 3 Sqn.
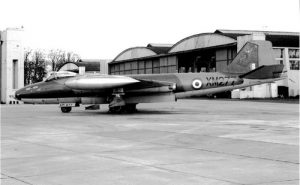
Photo Canberra B (I).8 – 154: Canberra XM277 taken after its return to 14 Sqn in 1967. Note the letter ‘P’ painted on the fin just below the squadron insignia.
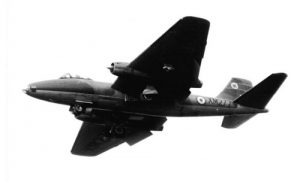
Photo Canberra B (I).8 – 155: Canberra XM277, while with 3 Sqn this time, coded ‘H’. This letter was taken over by XM273 on 28 October 1971.
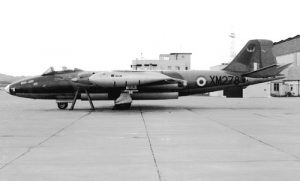
Photo Canberra B (I).8 – 156: Canberra XM278 of No. 14 Sqn.
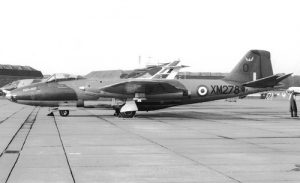
Photo Canberra B (I).8 – 157: Canberra XM278 of No. 14 Sqn, coded ‘O’.
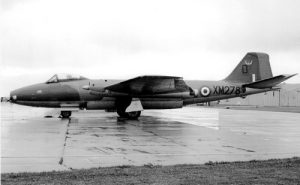
Photo Canberra B (I).8 – 158: Another view of XM278/O of No. 14 Sqn.
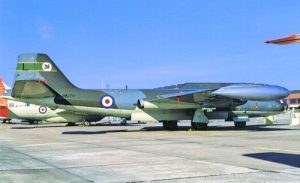
Photo Canberra B (I).8 – 159: Canberra XM279 seen at the end of its career with 3 Sqn, coded ‘L’. Note the small serial.
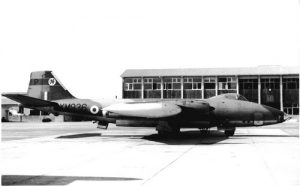
Photo Canberra B (I).8 – 160: Right side view of Canberra XM936/P of No. 3 Sqn.
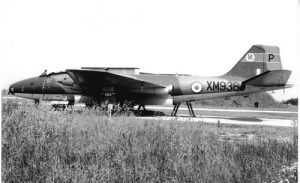
Photo Canberra B (I).8 – 161: Left side view of Canberra XM936/P of No. 3 Sqn.