
Each photograph is offered at a 300dpi res/13x8cm size making them available for a very good quality digital print, but also for Iphone/IPad, smartphone or computer screen (but should convert the image into a jpeg format for doing so)
Two related books: Allied Wings No. 10 (Hawker Fury Pt-1) & Allied Wing No. 17 (Hawker Fury Pt-2), both being also available on digital versions in this site
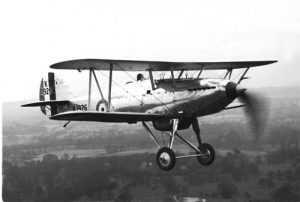
Photo Fury 01: Hawker Fury Mk. I K1926, the first production Fury taken in flight in 1931 before delivery to the RAF.
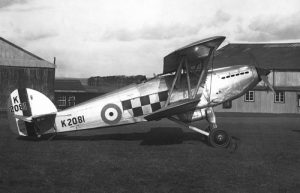
Photo Fury 02: Hawker Fury Mk. I K2081 of 43 Sqn in 1933. This Fury ended its career as an instructional airframe in April 1938.

Photo Fury 03: Hawker Fury Mk. I K2041 of 1 Sqn. The rudder painted in RAF colours indicate that the photo was taken before 1934. The spinner and wheel were probably painted in red, the colour of A Flight.
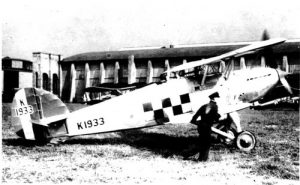
Photo Fury 04: Hawker Fury Mk. I K1933, mount of the A Flight leader of 43 Sqn as indicates the fin painted in red. K1933 was lost when it collided in air with K1936 in February 1933.
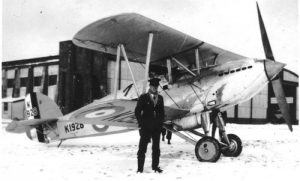
Photo Fury 05: Hawker Fury Mk. I K1928, mount of the B Flight leader with the fin painted in blue (as well the spinner and wheels).
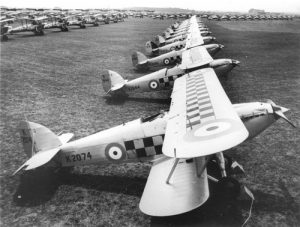
Photo Fury 06: Hawker Furies of 43 Sqn in July 1935, then based at Tangmere.
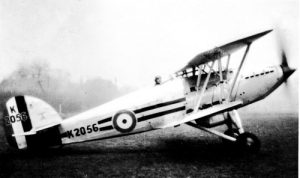
Photo Fury 07: Hawker Fury Mk. I K2056 of 25 Sqn seen in February 1934.

Photo Fury 08: Hawker Fury Mk. I K2080 with full 43 Sqn markings
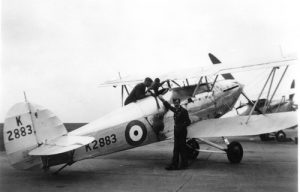
Photo Fury 09: Hawker Fury Mk. I K2883 of 11 FTS in 1937
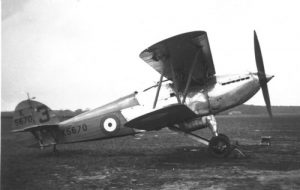
Photo Fury 10: Hawker Fury Mk. I K5670 of 5 FTS. Shortly before WW2, aircraft of FTS were repainted trainer yellow paints
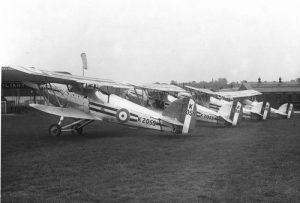
Photo Fury 11: Three Hawker Furies of 25 Sqn lined-up in 1932. K2059 with the blue fin is the B Flight Commander’s machine
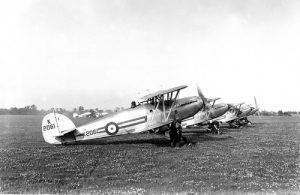
Photo Fury 12: Hawker Fury Mk. I K2061 of 1 Sqn starting up
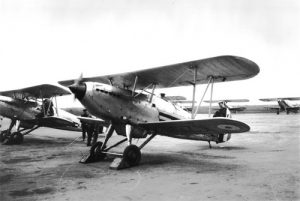
Photo Fury 13: Hawker Fury Mk. I K2062 of 25 Sqn based at Hawkinge, lined-up with other Furies with engines running
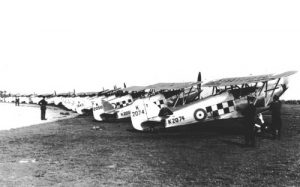
Photo Fury 14: Hawker Furies of 43 Sqn lined-up
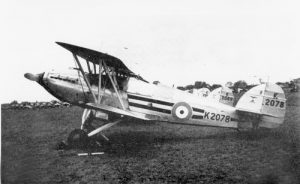
Photo Fury 15: Hawker Fury Mk. I K2078 served with 25 Sqn between 1933 and 1937 before becoming an instructional airframe
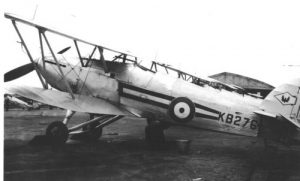
Photo Fury 16: Hawker Fury Mk. II K8276 seen just before the Munich crisis with 1 Sqn. Note the squadron insignia on the fin
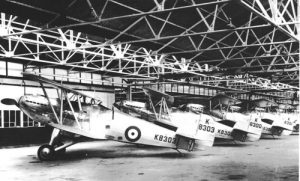
Photo Fury 17: The last Hawker Furies built were assigned at first but stored instead like K8303, K8300 and K8301
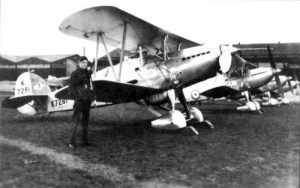
Photo Fury 18: Hawker Fury MK. II K7281 with 41 Sqn markings on the fin. K7281 was flown by the B Flight Commander as indicates the fin painted in blue
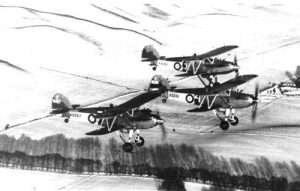
Photo Fury 19: Formation of three Hawker Furies of No. 8 FTS at the end of the thirties
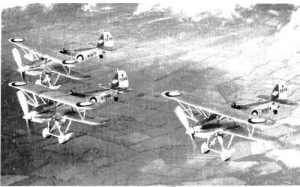
Photo Fury 20: Hawker Fury Mk. II K7266 leading K7272 and K7274 during a training flight. All belong to 41 Sqn
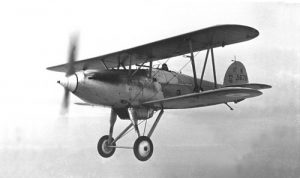
Photo Fury 21: Hawker Fury Mk. I K5678 was delivered to the Royal Air Force College (RAFC) from the factory in December 1935 and was later shipped out to South Africa
Photo Fury 22: An unidentified Hawker Fury Mk. II while serving as an instructional airframe, as many Fury Mk.II at the end of their career
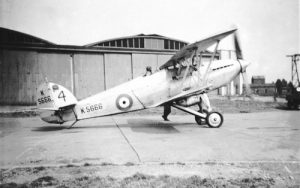
Photo Fury 23: Hawker Fury Mk. I K5666 while being on charge of the RAFC in February 1938
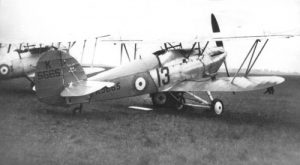
Photo Fury 24: Another Fury Mk. I of RAFC, K5665. It served at the RAFC until December 1939
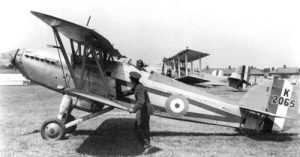
Photo Fury 25: Hawker Fury Mk. I K2065 of No. 1 Sqn and coded ‘J’, visible on the engine cowling
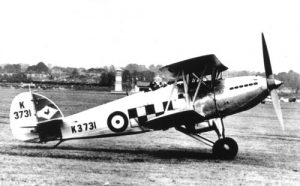
Photo Fury 26: Hawker Fury Mk. I K3731 of No. 43 Sqn and served with this squadron until December 1938
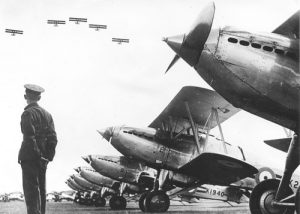
Photo Fury 27: Line-up of No. 1 Squadron Furies in 1933
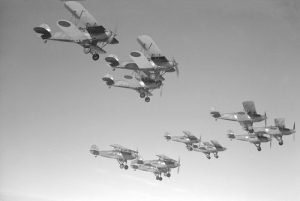
Photo Fury 28: No. 43 Squadron ‘Flying Cocks’ flying over the cloud with a new camouflage introduced for the Munich crisis in 1938
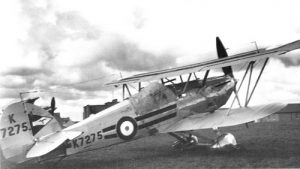
Photo Fury 29: Hawker Fury Mk. II K7275 of No. 25 Sqn with its full squadron markings
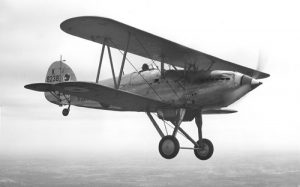
Photo Fury 30: Hawker Fury Mk. II K8238 of the Central Flying School (CFS) in 1936

Photo Fury 31: Hawker Fury Mk. II K7270 of No. 25 Sqn

Photo (SAAF) Fury 32: SAAF Hawker Fury 202 at the time it was serving at the Central Flying School
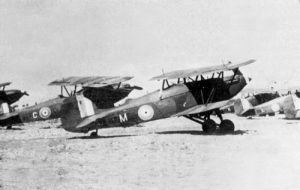
Photo (SAAF) Fury 33: SAAF Hawker Fury 217/M of No. 43 Sqn, SAAF in 1942. It survived until January 1944
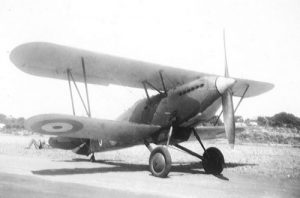
Photo (SAAF) Fury 34: SAAF Hawker Fury 213/J of No. 43 Squadron, SAAF in 1942. It was later destroyed in an accident in April 1943
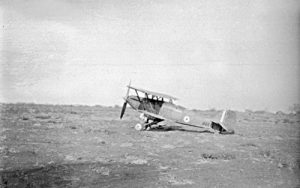
Photo (SAAF) Fury 35: SAAF Kawker Fury 203 in East Africa in 1940
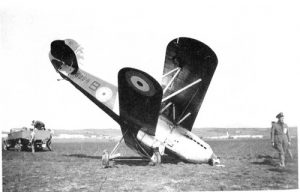
Photo Fury 36: Hawker Fury Mk. II K8234 seen after its undercarriage collasped at Penrhos on 21 April 1937. It was flying with 6 Flying Training School (FTS) at that time
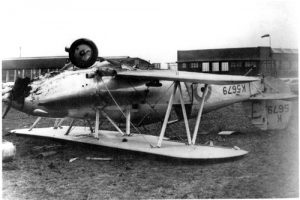
Photo Fury 37: End of career for the Hawker Fury Mk. I K5679 of No. 11 FTS which overturned in landing at Wittering on 18 March 1937
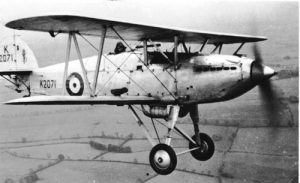
Photo Fury 38: Hawker Fury Mk. I K2071 was issued to No. 3 FTS in January 1936 – here in flight – after having served with No. 25 Sqn. It was later on transferred to the SAAF as 224
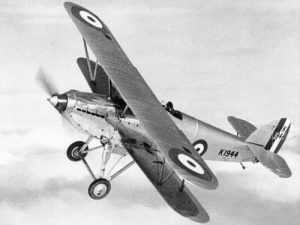
Photo Fury 39: Hawker Fury Mk. I K1944 seen before its delivery to the RAF in April 1931
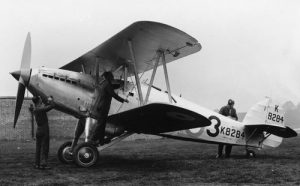
Photo Fury 40: Hawker Fury Mk. II K8284 of No. 10 FTS in 1938
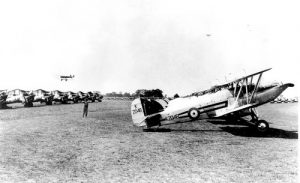
Photo Fury 41: Line-up of No. 1 Squadron’s Hawker Furies, with K2048 in the forefront
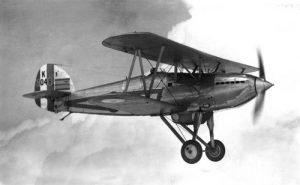
Photo Fury 42: Hawker Fury Mk. I K2048 was No.1 Squadron’s CO, Squadron Leader C.B.S Spackman. Later, K2048 served with No.25 Squadron
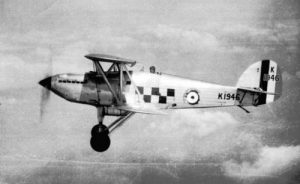
Photo Fury 43: Hawker Fury Mk. I K1946 was on No.43 Squadron charge from July 1936 onwards. Nevertheless, it is obvious that this Fury did not receive new paint since the factory as the fuselage roundel is clearly faded out and the rudder is still painted, offically removed after August 1934!
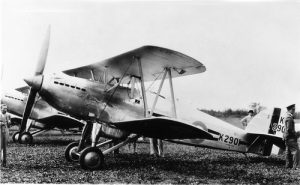
Photo Fury 44: Hawker Fury Mk. I K2901 of No. 1 Sqn in 1934
Photo Fury 45: Hawker Fury Mk. I K5675 during the summer of 1937. Later in September this aircraft will be involved in accident, its pilots running into K2043 after landing; but it was repaired and returned to service and was one of the last Fury Mk.I to be on charge end 1938. K5675 eventually became 228 in SAAF
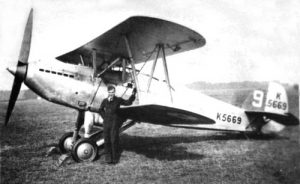
Photo Fury 46: Hawker Fury Mk. I K5669 coded ‘9’ at No.7 FTS in 1937. It never served with a front line squadron. Fin, wheel and spinner are believed to be light blue and the number 9 in white
Photo Fury 47: Hawker Fury Mk. I K5677 whislt serving with RAFC in May 1937. It had served before with No.25 Squadron. The aircraft is partially painted in yellow
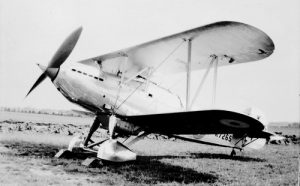
Photo Fury 48: Hawker Fury Mk. II K7265 seen before its delivery to the RAF in 1936

Photo Fury 49: Hawker Fury Mk. I K1938 of No. 11 FTS taken during engine warm-up. The wheels and the the individual number ‘2’ are belived to be blue. The spinner is possible blue as well
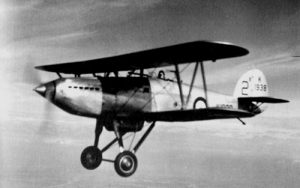
Photo Fury 50: Same aircraft (K1938) taken in flight
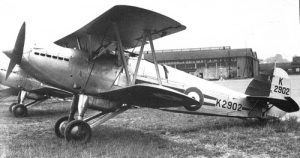
Photo Fury 51: Hawker Fury Mk. I K2902 of No.1 Squadron. It belongs to B Flight with its fin, wheels and spinner painted in blue. Its individual letter ‘A’ can be noticed on the cowling, painted in red. No.1 Squadron seems to have been the only Fury squadron to have used individual letters
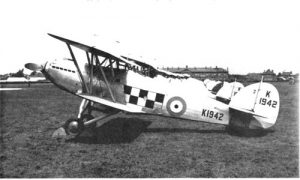
Photo Fury 52: Hawker Fury Mk. I K1942 while serving with No.43 Squadron. The lack of painted rudder suggests that the photo was taken after August 1934

Photo Fury 53: Hawker Fury K2900 of No. 1 Squadron
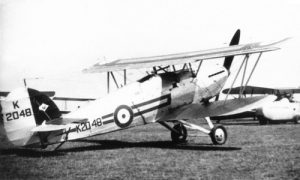
Photo Fury 54: Hawker Fury K2048 of No. 1 Squadron
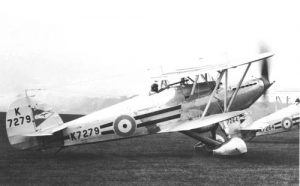
Photo Fury 55: Hawker Fury Mk. II K7279 of No. 25 Squdron. This aircraft crashed on 2 August 1937
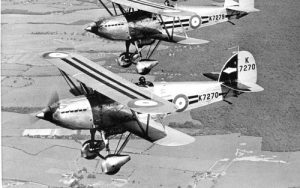
Photo Fury 56: Hawker Fury Mk. II K7270 flown by the OC of No. 25 Squadron, Squadron Leader H.H. Down

Photo Fury 57: Hawker Fury Mk. II K7265 of No. 41 Squadron